You can create a standard welcome message to be sent to mailboxes in a domain or company from the reseller control panel. These messages can contain plain text, or you can send messages that support HTML and attachments.
Creating a welcome message in the Control Panel
At the company or domain level, you can create a welcome message sent to all new accounts when created.
Note: You must be a company administrator to send a company bulletin.
- In the email section of the Control Panel, select Email domains.

- Navigate to the domain for which you want to create a domain-level welcome message and click the Settings tab.
Note: you can go to the setting under the email tab to create a company-level welcome message.
- Scroll down to the welcome message section, click Edit.

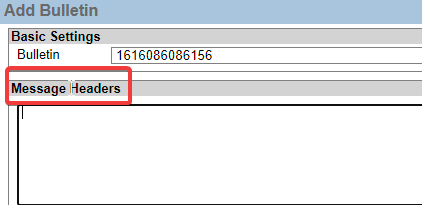
- In the message headers section, enter the email address from which you want the welcome message to be sent, a subject for your bulletin, and any other header information.

Return-Path: bounceaddress@example.com From: "Example.com Announcement" Subject: Welcome! Date: Thu, 10 Jan 2021 12:30:00 -0500 MIME-Version: 1.0 Content-Type: text/html; charset="ISO-8859-1" Reply-To: announce@example.com - In the message body section, enter the body of your message. You can add HTML content, mime-encoded image information, and/or text.

- Click Save.

Back to top
In the message headers section, enter the email address you want the bulletin to be sent from and enter a subject for your bulletin. You can add other header information as well.

In the message body section, enter the body of your message. You can add HTML content, mime-encoded image information, and text.

Click Create.
Note: Bulletins that you defined as auto are sent automatically; manual bulletins are not sent until you decide to post them.

Optionally, to preview the message before sending it, click the checkbox next to the bulletin to select it, and then click Post selected.

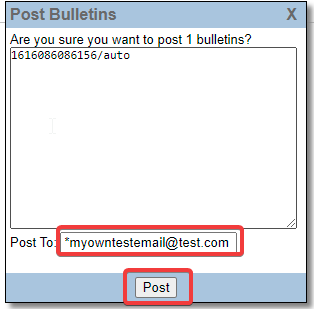
Enter your own email address in the post to field, and then click Post. You can then view the bulletin in your Inbox.

Creating a bulletin in the MAC
- Based on your cluster settings, use your browser to navigate to the MAC.
- Navigate to the domain for which you want to create a domain-level welcome message and click the Bulletins tab.

- In the bulletin field, enter a name for the bulletin. The default is a system-assigned number.

- From the mode drop-down list, choose how you want the bulletin to be delivered.
- Auto—Automatically deliver the bulletin to every account that currently exists and new accounts when created.
- Manual—Send the bulletin to every account that currently exists.


Return-Path: bounceaddress@example.com
From: "Example.com Announcement"
Subject: Announcing New Service Enhancements
Date: Thu, 10 Jan 2021 12:30:00 -0500
MIME-Version: 1.0
Content-Type: text/html; charset="ISO-8859-1"
Reply-To: announce@example.com
Note: Bulletins that you defined as auto are sent automatically; manual bulletins are not sent until you decide to post them.


Post manual bulletins in the MAC
Bulletins are only delivered locally, and any forwarding settings are ignored. Accounts that are set to forward only will not see the bulletin.
- Select the bulletins that you want to send, and then click Post selected.

- To send the bulletin to every account in the domain or company, ensure an asterisk (*) in the Post to field and click Post.
Note: To send the bulletin to specific accounts, enter the individual email addresses in the Post To field, separated by commas.
Include HTML content
You must put this line in the header as this instructs email clients to display the content as HTML.
Content-Type: text/html; charset="ISO-8859-1.
Was this article helpful? If not please submit a request here
How helpful was this article?
Thanks for your feedback!
Do you still need help? If so please submit a request here.


