You can make payments in the OpenSRS control panel by credit card, PayPal, and Automated Clearing House (direct withdrawal). We only accept payments remitted in U.S. Dollars (USD).
Funds deposited into your Reseller account through credit cards or PayPal are subject to a 3% processing fee. This fee is charged on the statement amount (total billed to your credit card/PayPal), with the remainder being placed in your account.
All Canadian Registration Service Providers must pay Goods and Services Tax. In addition, all good and services purchased in Ontario or British Columbia after July 1, 2010 are subject to Harmonized Sales Tax (HST).
For information on tax and rebates, please refer to the Canadian Customs and Revenue Agency web site.
We recommend that you purchase at least one month's worth of credits at a time. Depending on the payment method that you choose, it can take up to two business days after payment is received to apply your payment to your account.
For information on managing your account balance through the RWI, click here.
To manage your account balance, click on the menu icon on the top right of the control panel and select Billing and Payments.
There are five tabs in the Billing and Payments section of your reseller account:
Account Balances Tab
Under Reseller Account Balance you can see a breakdown of the funds in your reseller account:
- Current Account Balance - The full amount currently in your funds account.
- Amount Allocated for Pending Transfers - The amount set aside for domain transfers that are still in progress. When the transfers are complete those funds will be deducted from the account and the balance amount will be updated.
- Amount Allocated for New Registration in Progress - The amount set aside for new asynchronous domain registrations that are still in progress. When the registrations are complete those funds will be deducted from the account and the balance amount will be updated.
- Amount Allocated for Other Items - The amount set aside for any other transactions that are still in progress. These transactions could include things like SSL certificate purchases, taxes, handling fees and hold transactions. When the transactions are complete those funds will be deducted from the account and the balance amount will be updated.
- Available Account Balance - The amount of funds still available for use.
Your Storefront Account and Sub-Resellers Commissions (if applicable) are also listed on this page below the Reseller Account Balance information.
Add Funds Tab
You can add funds to your reseller account by credit card, PayPal or Automated Clearing House (US and Canada only).
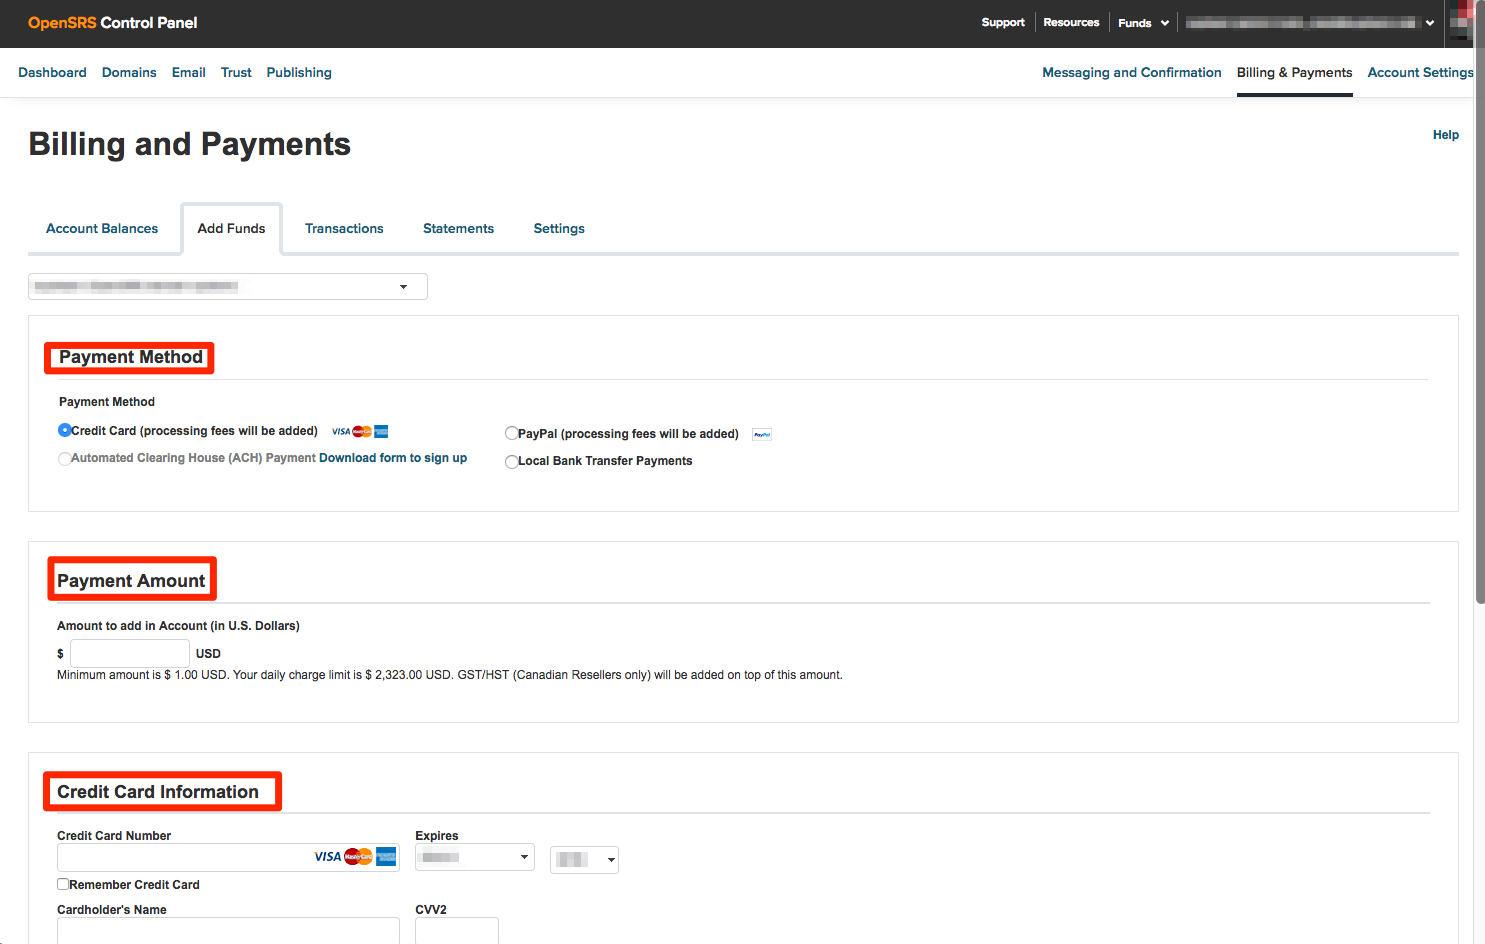
Credit Card Payment
Some things to keep in mind when you make a Credit Card payment:
- Your payment amount must be between your listed minimum and maximum daily charge limit.
- Billing details will be pre-populated if you choose an existing card, and cannot be updated.
- Funds deposited into your reseller account by way of a credit card payment are subject to a 3% processing fee. This fee is charged on the statement amount (total billed to your credit card), with the remainder being placed in your account.
- You will have the option to download or print a copy of your payment confirmation but you will only have the option as long as you are on that confirmation page. Once you navigate away from the page, that option is no longer available.
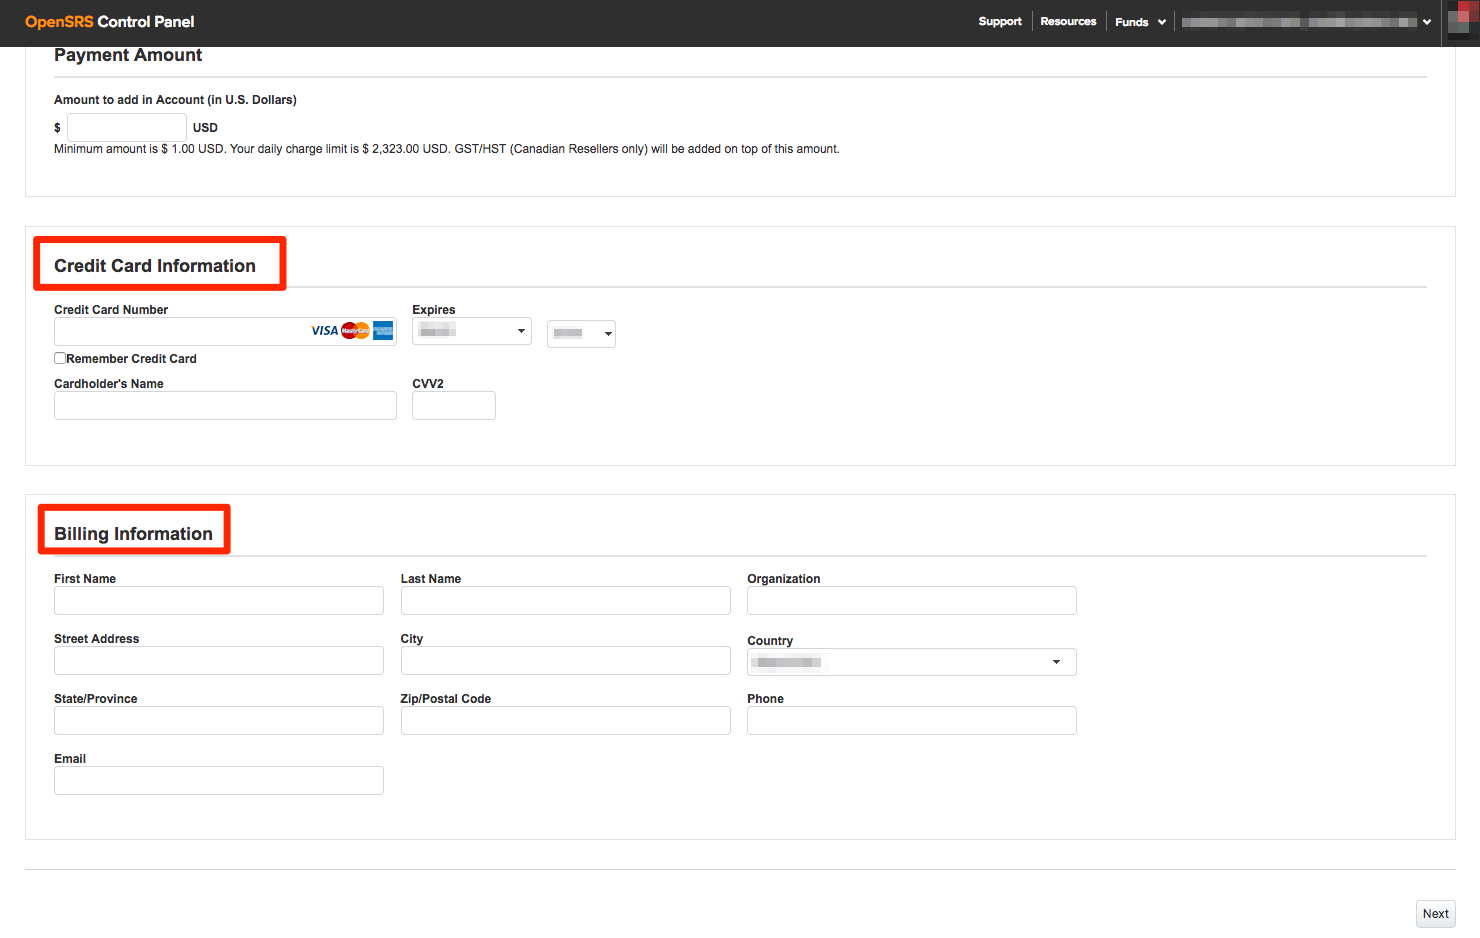
PayPal Payment
Some things to keep in mind to keep in mind when making a PayPal payment:
- Your payment amount must be between your listed minimum and maximum daily charge limit.
- Click Preview Total Charge to see what your total will be. This information will not be displayed while you are confirming the payment on PayPal's site.
- Funds deposited into your reseller account by way of a PayPal are subject to a 3% processing fee. This fee is charged on the statement amount (total billed), with the remainder being placed in your account.
- When you confirm your payment information on PayPal's site and click Continue this does not complete your payment. Clicking Continue simply brings you back to the control panel where you must complete the transaction after verifying your payment details. Once you've verified, click Pay to complete the transaction.
- You will have the option to download or print a copy of your payment confirmation but you will only have the option as long as you are on that confirmation page. Once you navigate away from the page, that option is no longer available.
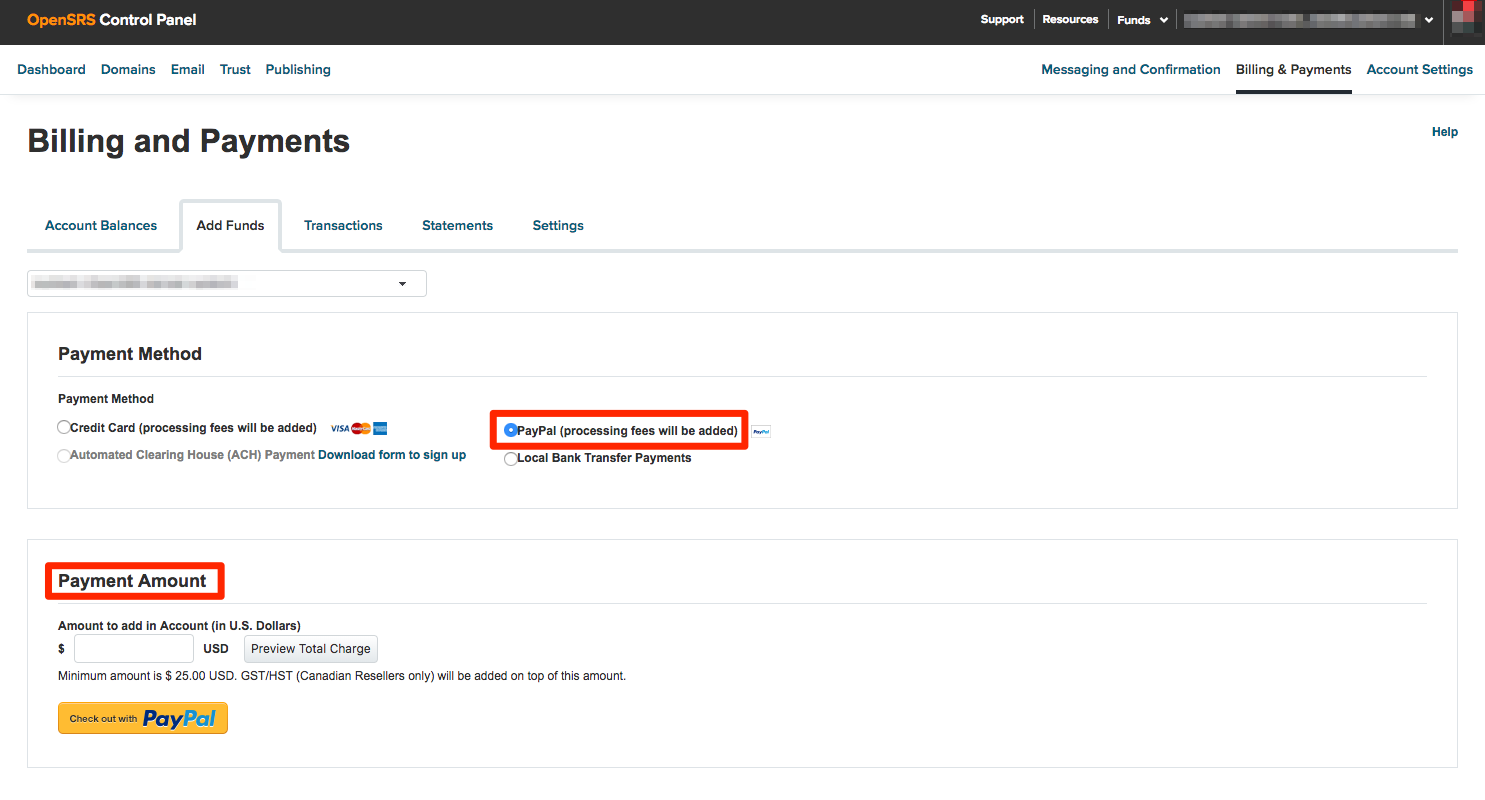
Automated Clearing House
You will only be able to select the option to make an ACH payment if it is set up for your account. To set up ACH payments go to the Settings tab, download the sign up form, fill it out and use the submission feature on that page to apply. Once your ACH application has been approved (usually 3-5 business days) you'll be notified and you'll be able to make manual ACH payments or set up automated ones.
Some things to keep in mind to keep in mind when making a ACH payment:
- Your payment amount must be between your listed minimum and maximum daily charge limit.
- ACH payments are only automated if you enable "Automated Payment" on the Settings tab; otherwise you must make ACH payments manually.
- There is no 3% processing fee for ACH payments, however your bank may collect a fee for this transaction. Check with your banking institution to be sure.
- The information for the financial institution set up for your ACH payments is in the Automated Clearing House Bank Information section of this page and is display only. This information cannot be changed during the process of making an ACH payment.
- ACH payments are only available for Canadian and US resellers.
Transactions Tab
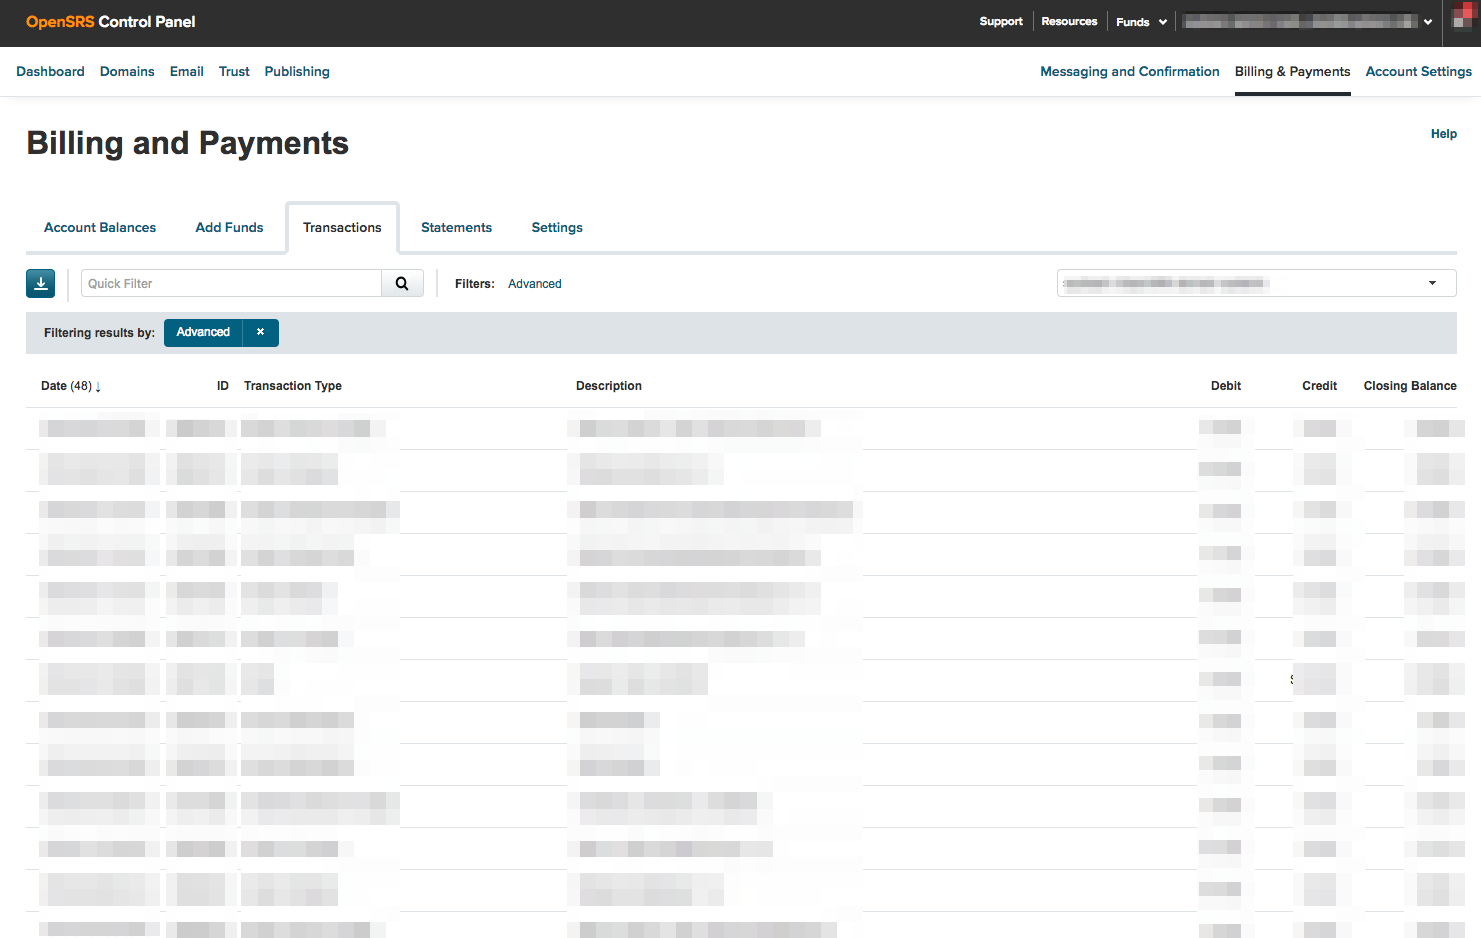
On the transactions page you can search for specific transactions a range of transactions by date. You can also download a list of your transactions from the last 30 days.
- In the Quick filter text box, enter all or part of the transaction ID, type, or description of the transaction that you want to find and click Search. There is a limit of 500 results that can be returned per search.
- Click a column heading to reorder the data based on that column.
- To export a csv file of your transactions from the last 30 days, click the blue download button to the left of the search box.
- Note: If you have a very large account that csv file download can take up to 20 minutes. Avoid clicking the download button multiple times.
- Click Advanced Filtering to filter transactions by date.
Statements Tab
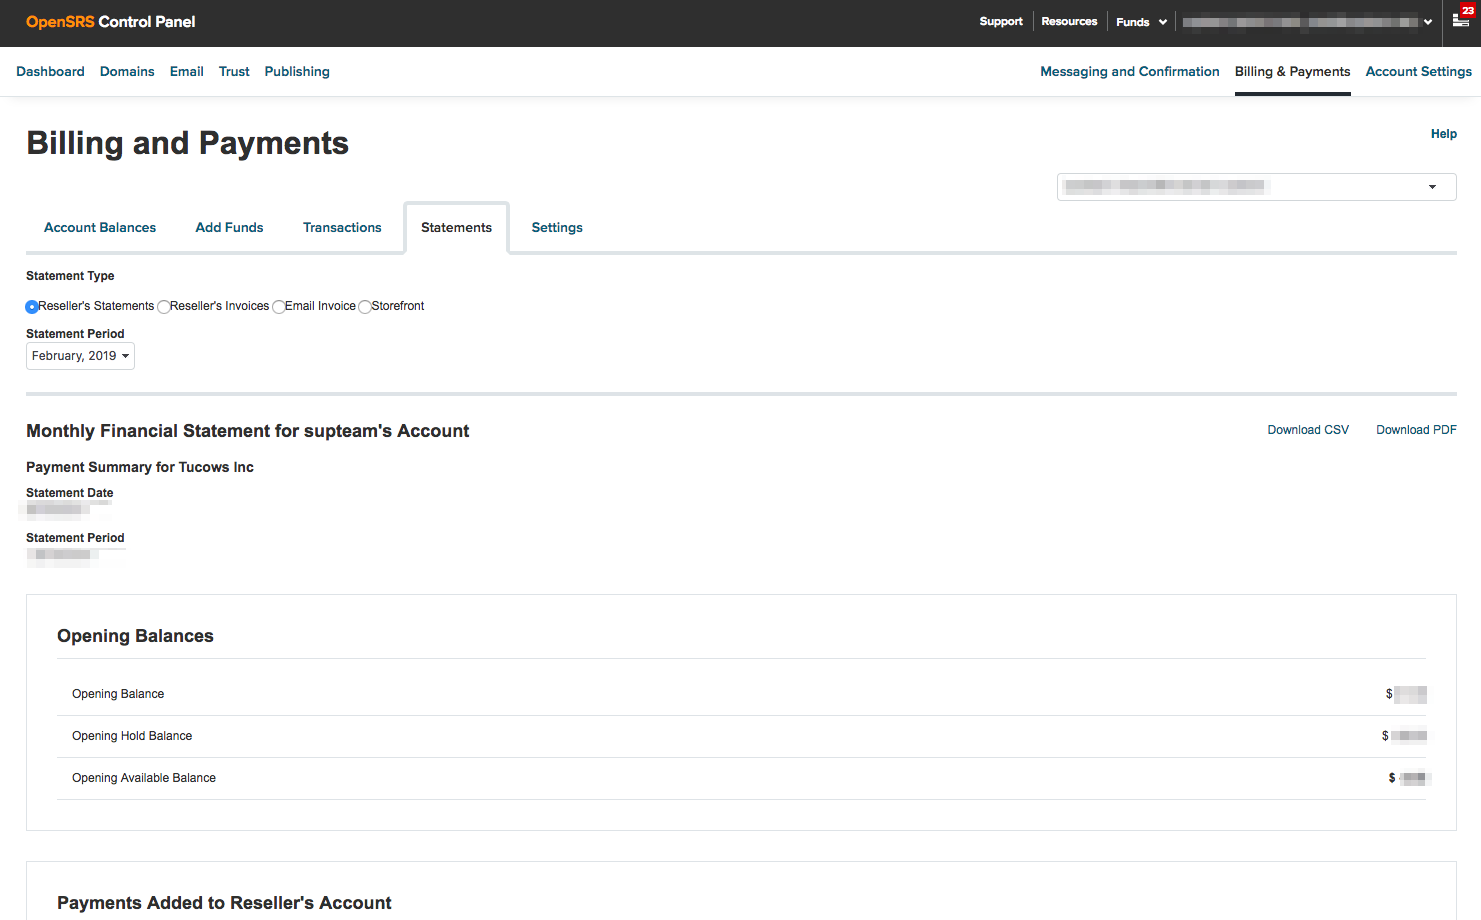
From the Statements tab, you can view your statements, invoices and storefront commission statements.
- Use the radio buttons to select the Statement Typethat you want to view.
- Choose from: Reseller's Statements, Reseller's Invoices, or Storefront commission statements.
- Use the Statement Period drop down to select any one of the last 12 months.
- Click the Download CSV or Download PDF links to get a csv or pdf download of any statement.
Click on the transaction amount links to see a window with more details of the particular transaction.
Settings Tab
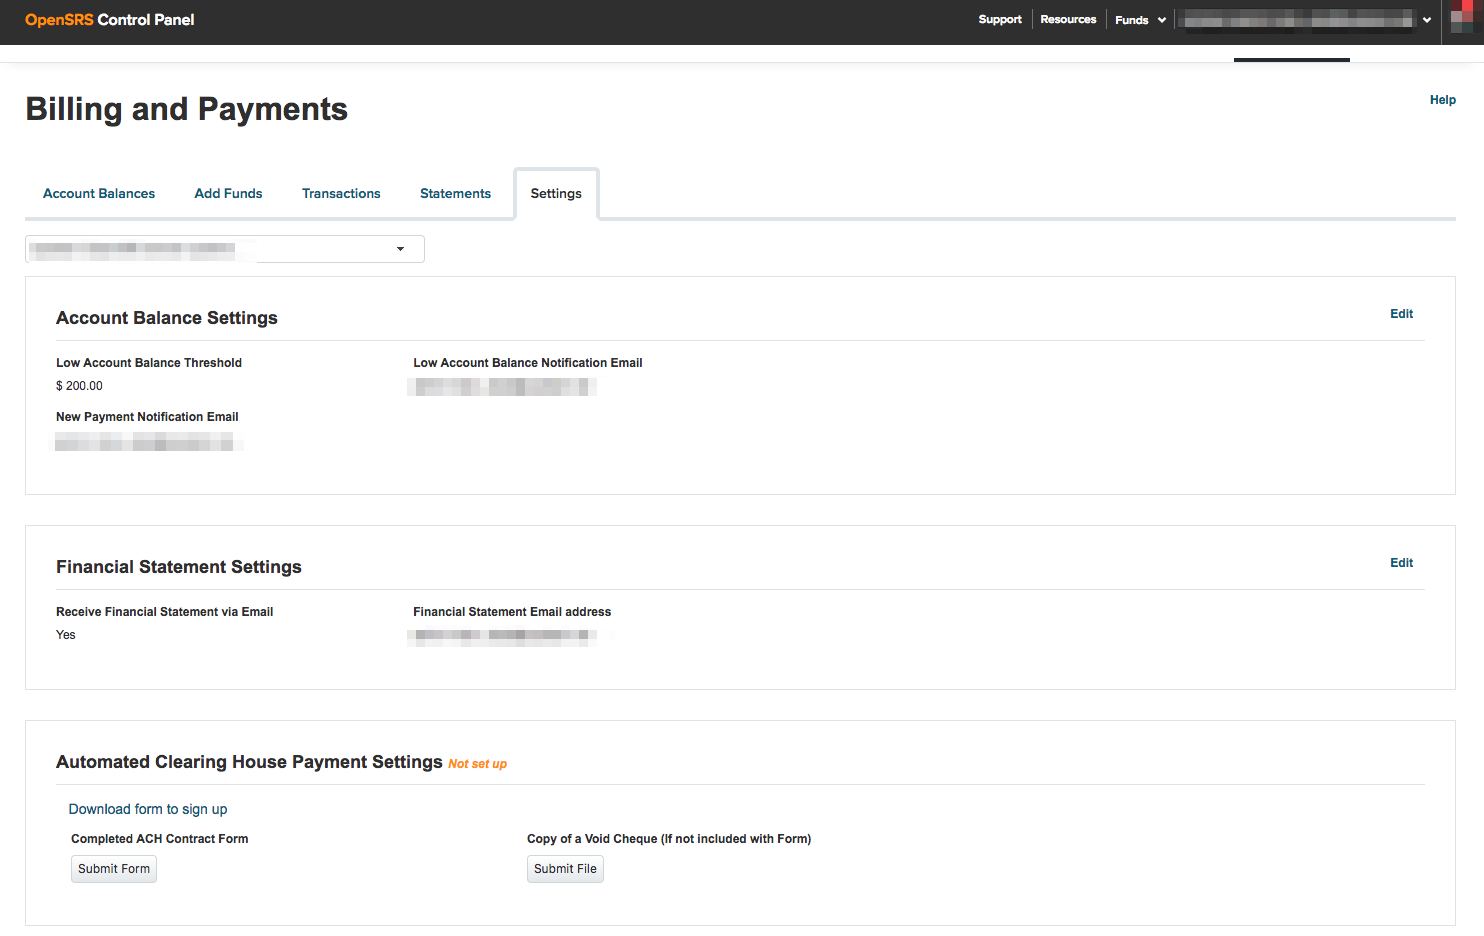
On the Settings tab, you can view:
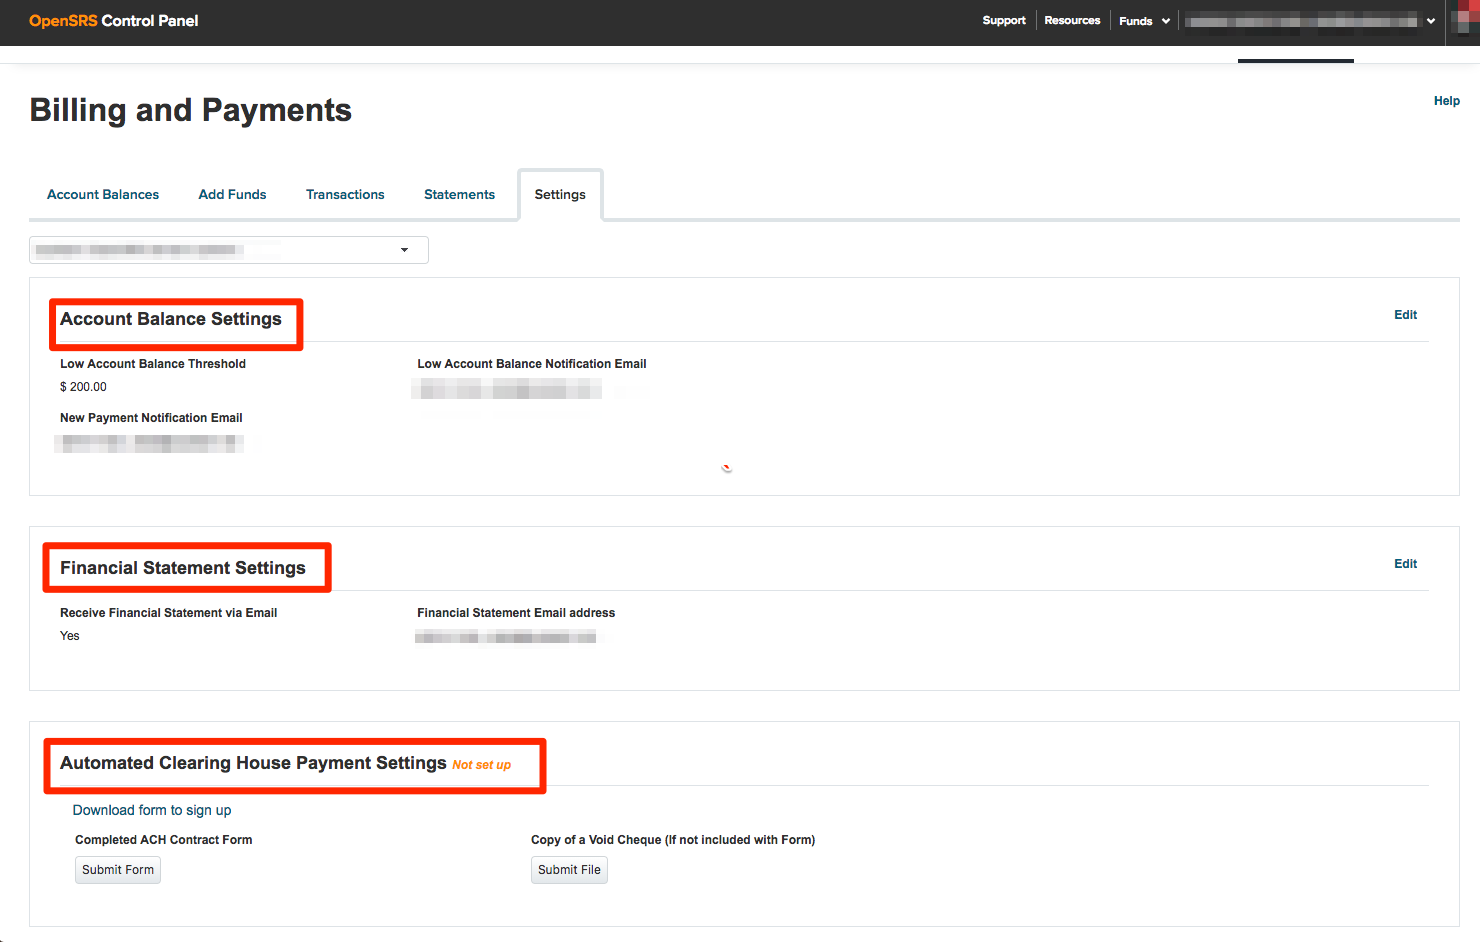
- Account Balance Settings
- Financial Statement Settings
- Automated Clearing House Settings
- Automated Clearing House Bank Information
You can also submit your application for Automated Clearing House from this page if you don't already have it set up.
Saved Credit Cards
You can delete saved credit cards from the account. Credit cards are added when you use a new credit card to add funds to your account.

Account Balance Settings
You can view or update the following in the Account Balance Settings section:
- Low Account Balance Threshold
- Change the US dollar amount at which your account triggers a notification that funds should be added.
- Low Account Balance Notification Email
- Update the email address to which low account balance notifications are sent. Only one email address can be set here but it doesn't need to be the same as the new payment notification email address.
Note: The low account balance notification email is only sent if the value is set to be greater than $0.00.
- Update the email address to which low account balance notifications are sent. Only one email address can be set here but it doesn't need to be the same as the new payment notification email address.
- New Payment Notification Email
- Update the email address to which new payment notifications are sent. Only one email address can be set here but it doesn't need to be the same as the low account balance notification email address.
Financial Statement Settings
You can enable or disable the option to receive statements by email and set an email address for them to be sent to. This does not include invoices or storefront commission statements.

Automated Clearing House Settings
If you've set up Automated Clearing House payments on your account, you can either manually add funds to your account via ACH from the Add Funds tab or you can set up Automated Payments in this section of the Settings tab.
To set up automated payments via ACH:
- Enable Automated Payment.
- Enter an email address in the ACH Notfication Email field. Notifications can only be sent to one email address.
- Set the amount of the pre-authorized payment in the ACH Pre-authorized Amount field.
- In the ACH Low Account Balance Threshold field set the amount that must be remaining in your reseller funds account before a pre-authorized payment will be triggered.
Whenever your reseller account reaches the low account balance threshold amount, your reseller funds account will be topped up with the ACH pre-authorized payment amount. Then a notification email will be sent to the listed email address.
Automated Clearing House Bank Information
The information for your ACH financial institution is displayed here. If you want to update this information, get in touch with our support team at help@opensrs.com.
Set up Automated Clearing House Payments
If you don't have Automated Clearing House payments set up on your account, and you are a reseller in Canada or the US, you will see the option to start the process under Automated Clearing House Settings:
- Click Download form to sign up and fill it out.
- Click Submit Form and upload your form.
- Click Submit File and upload your voided check if it's not included in your form.
Once your ACH application has been approved (usually 3-5 business days) you'll be notified and you'll be able to set up your ACH payments.
Was this article helpful? If not please submit a request here
How helpful was this article?
Thanks for your feedback!


